
Configure budgets and manage approvals
Use this guide to configure budgets, require manager approval, review submitted expenses and confirm the result. For customers with approval requirements, select Approval Required and assign at least one manager before employees submit expenses.
The approval workflow
Administrator configures the budget → employee creates or saves a draft → employee submits → expense becomes Pending Approval → assigned manager reviews → Approved or Rejected → employee checks the result. Finance processes reimbursement according to company policy.
| Role | Responsibility |
|---|---|
| Administrator | Configure budget currency, limits, submitters, managers and categories. |
| Employee | Choose the correct budget, provide the expense details and receipt, then submit. |
| Assigned manager | Compare the claim with the receipt and policy; approve or reject with a reason. |
| Finance or back office | Use approved expense information for processing and payout. |
Training example
The example follows Default Budget in the General channel of the Expenses_30062026 team. The administrator uses the Teams desktop client as the administrator account; the employee uses Teams in a browser as the employee account. The fictional £24.50 Transport claim is labelled TRAINING ONLY and Do not reimburse.
Open the team and channel containing the app, then select the Expenses tab. Use the account shown in the app footer to check your identity. An administrator can see Add Budget, Edit Budget and Approvals; the employee view offers Add Expense and View Expenses.
Configure the budget
- On Budgets, select Add Budget for a new budget or Edit Budget on the existing card.
- In the Budget tab, set a clear Name and Description, and select the Primary Currency.
- Choose Unlimited or Limited to match company policy. Review the spending controls shown when Limited is selected.
- Complete People & Approval and Categories before selecting Save. Reopen the budget to check that the intended settings were saved.
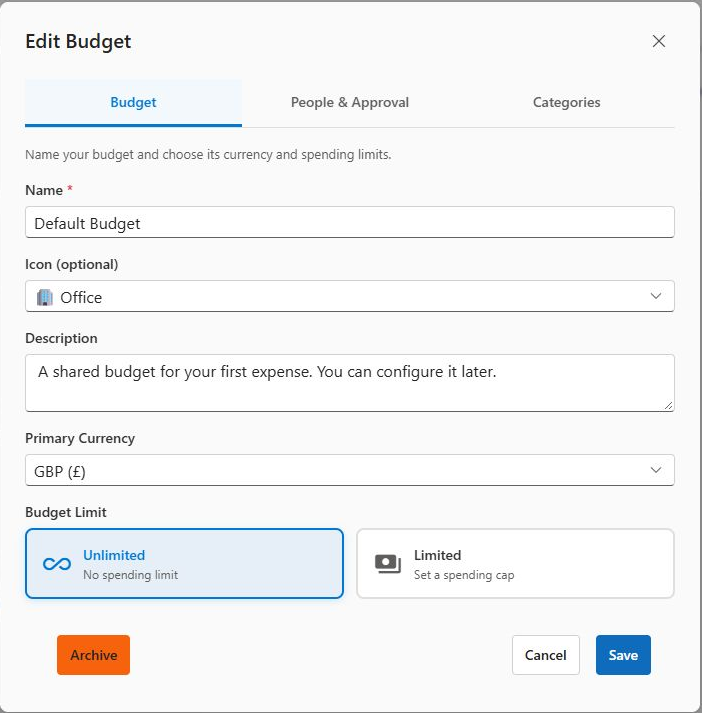
The example uses GBP and an unlimited budget. A spending limit and an approval requirement serve different purposes; configure both where policy requires them.
Require approval and assign managers
- Open Edit Budget and select People & Approval.
- Under Who can submit expenses, choose Everyone for all workspace members or Selected Users for specific team members.
- Select Approval Required. Select at least one person in Managers; use Add Manager where needed.
- Select the intended Monthly Summary Contacts if finance needs the approved expense summary, then Save.
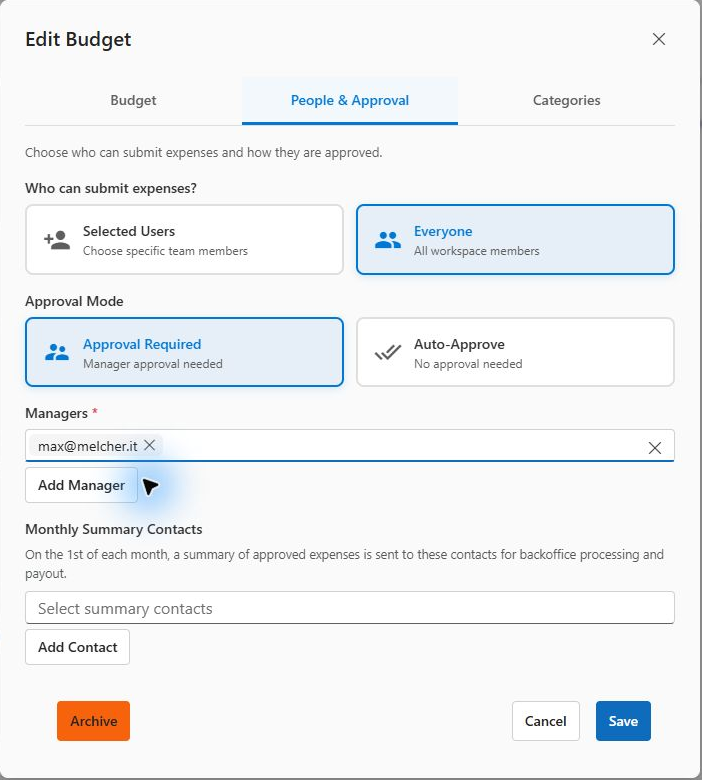
The manager assignment controls who receives the review work. Being an administrator and being an assigned budget manager are distinct responsibilities. Auto-Approve bypasses manager review and should be used only where company policy allows it.
Set categories and the finance handoff
- Open Edit Budget and select Categories.
- Maintain the Expense Categories used for tagging and receipt suggestions.
- Enable Category is required if employees must select a category before submission.
- Choose whether users may add their own tags, then Save. User-added tags stay on the expense and do not update the budget category list.
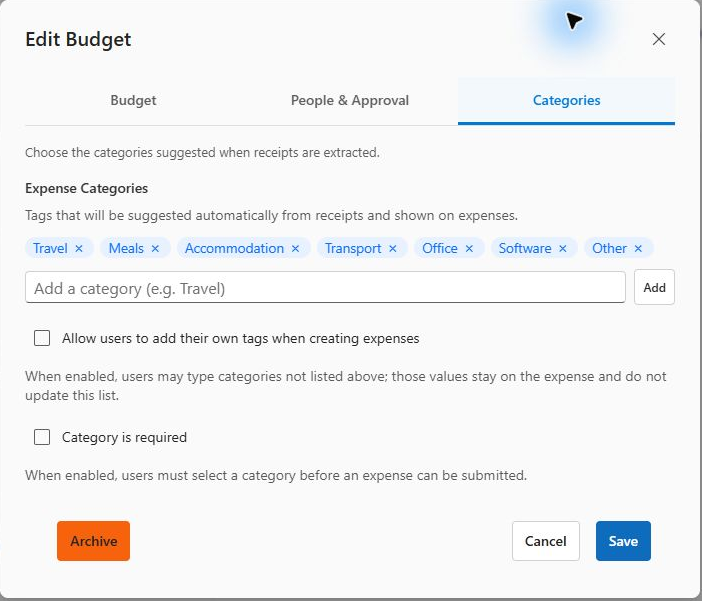
Monthly summary contacts
Under People & Approval, select Monthly Summary Contacts and use Add Contact as needed. The app states that a summary of approved expenses is sent to these contacts on the first of each month for back-office processing and payout. Set the recipients to match your finance process.
Approval records a review decision. Arrange reimbursement through the company payment process and verify payment separately.
Find an expense waiting for review
- From Budgets, select Approvals. A red badge shows the pending count.
- In Expenses Pending Approval, identify the employee, budget, amount, date and category.
- Select Review Expense to open the decision screen.
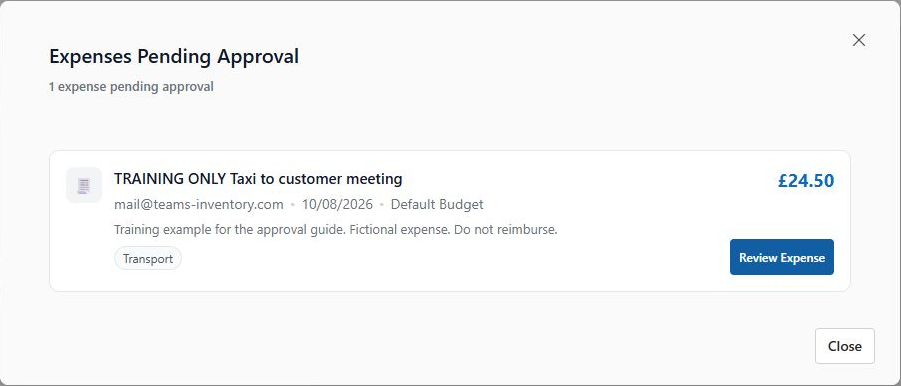
Check the handoff
In this example, the employee account submitted the fictional Transport claim for £24.50. It appears in the manager’s queue with its description and Default Budget. The employee sees Pending in the expense report and Pending Approval in the preview.
A saved draft is work in progress. Employees must submit it for review. If a claim is missing from the queue, confirm its status, budget and assigned managers before assuming that it has been approved.
Review and record the decision
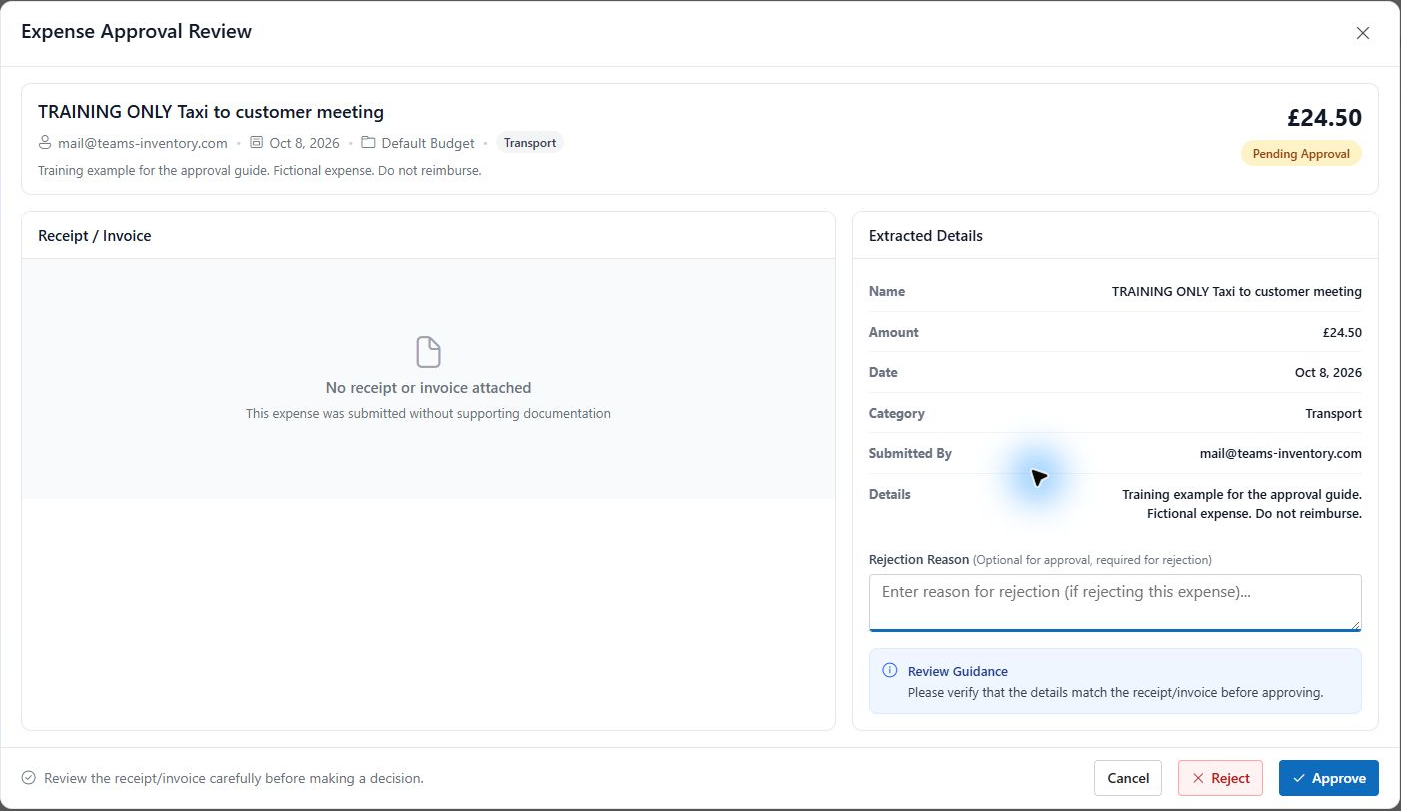
- Check the employee, budget, amount, currency, date, category and business purpose.
- Compare the Receipt / Invoice with Extracted Details. Check missing evidence against company policy.
- Select Approve when the claim meets policy. For rejection, enter a clear Rejection Reason and select Reject. The reason is required for rejection and optional for approval.
Write a useful rejection reason
State what needs to change, for example: Please attach a readable receipt showing the merchant, date and total, and confirm the business purpose. The employee should address the reason and follow the available correction and submission process.
The training claim was entered manually and has no receipt attached. Its approval demonstrates the workflow only. For real claims, apply your company evidence requirements before approving.
Verify completion and process approved expenses
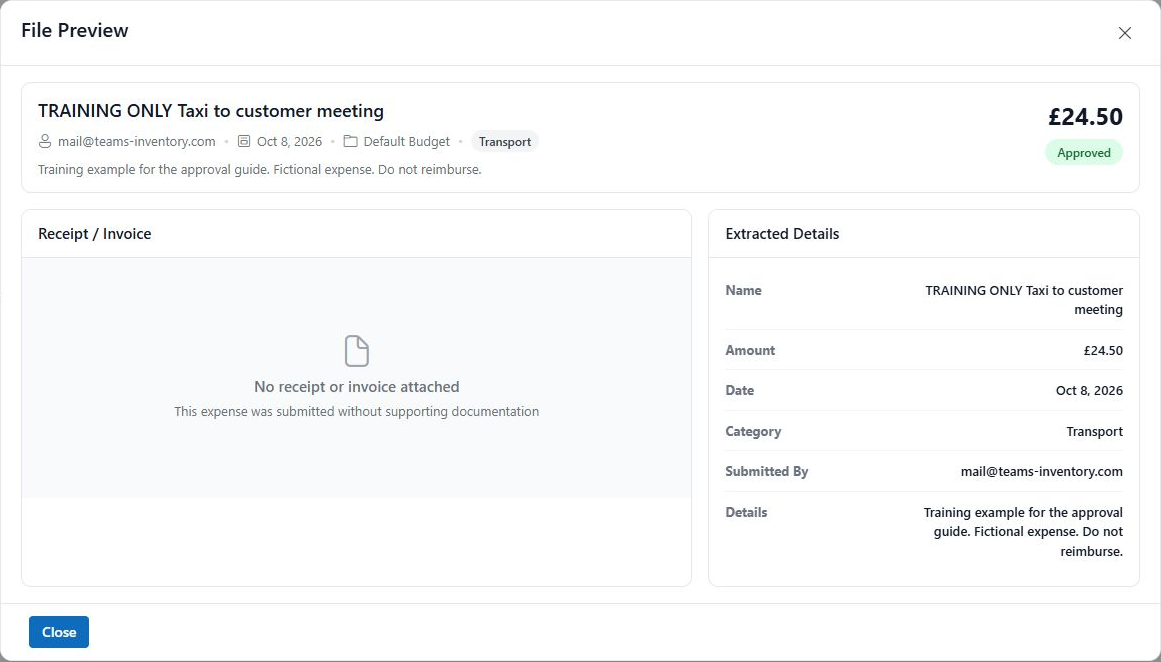
- After approval, verify the success message and confirm that the claim leaves Expenses Pending Approval.
- Open View Expenses on the budget. Use the date range, column filters and search to locate the claim.
- Confirm Approved in the expense report or preview. Use Export to Excel when a report is needed for the finance process.
Before rollout
Test one submission with an employee account and one review with an assigned manager. Confirm the budget currency, submitter list, approval mode, manager availability, category requirements and summary contacts for every customer budget.
Resolve common issues
Missing budget or edit controls: check the team, channel, account and role. Empty queue: check whether the employee saved a draft or submitted, and confirm Approval Required and manager assignment. Missing report row: clear filters and widen the date range. Stale result: close the preview and reopen the report or expense; use the saved status to confirm the outcome.