
Submit expenses and follow approval
Use this guide to record an expense, provide a receipt, submit it for approval and check the result. For a budget that requires approval, Submit sends your claim to an assigned manager. Save as Draft lets you finish later and does not complete the submission.
- Open the team and channel containing your Expenses App, then select Expenses.
- Check the account in the app footer and choose the correct budget.
- Select Add Expense to start, or View Expenses to find your claims.
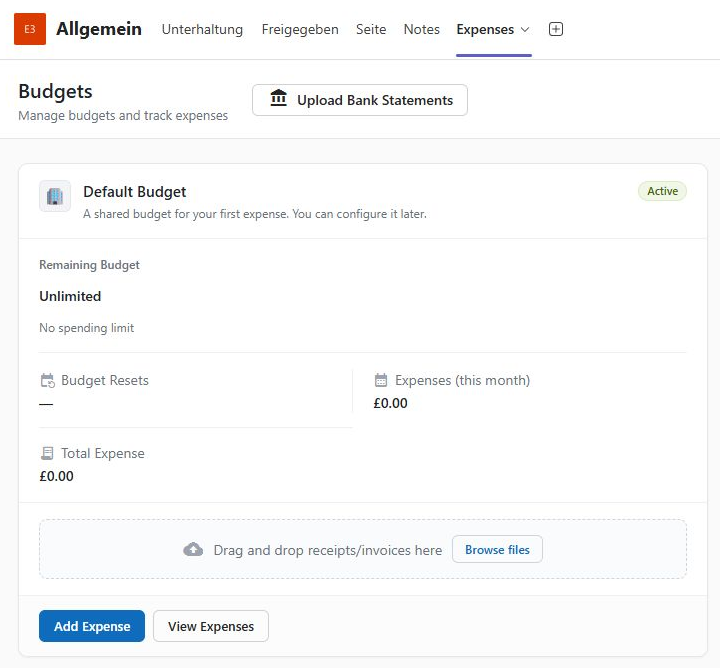
The example uses the employee account in Teams in a browser and Default Budget. The same app tasks are available through the Expenses tab in Teams. Your organisation may use different budget names, currencies and categories.
Start with a receipt
- On the chosen budget, select Add Expense.
- Drag a receipt into the upload area or select Browse. You can also use Browse files on the budget card.
- Use a clear, complete receipt. The app accepts JPEG, JPG, PNG, PDF and HEIC; the first-expense upload screen shows a limit of 10 MB.
- Review the extracted merchant or name, date, amount and currency before submitting. Select the correct category and add the business purpose.
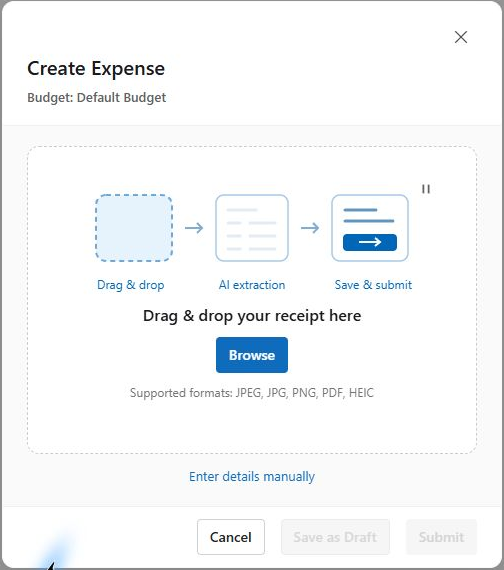
If you need to enter the claim yourself, choose Enter details manually. Manual entry does not supply receipt evidence. Follow your company policy for missing receipts and use the available upload control when supporting documentation is needed.
Check the details and submit
- Enter a clear Name and Description explaining the business purpose.
- Choose the Category. Your administrator can make it mandatory.
- Check Amount, Currency and Date against the receipt. The budget currency is the starting value; use the currency of the expense.
- Select Save as Draft if you need to finish later, or Submit when the claim is complete.
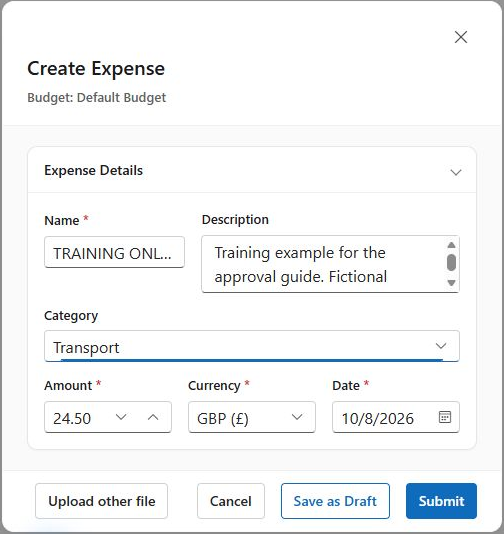
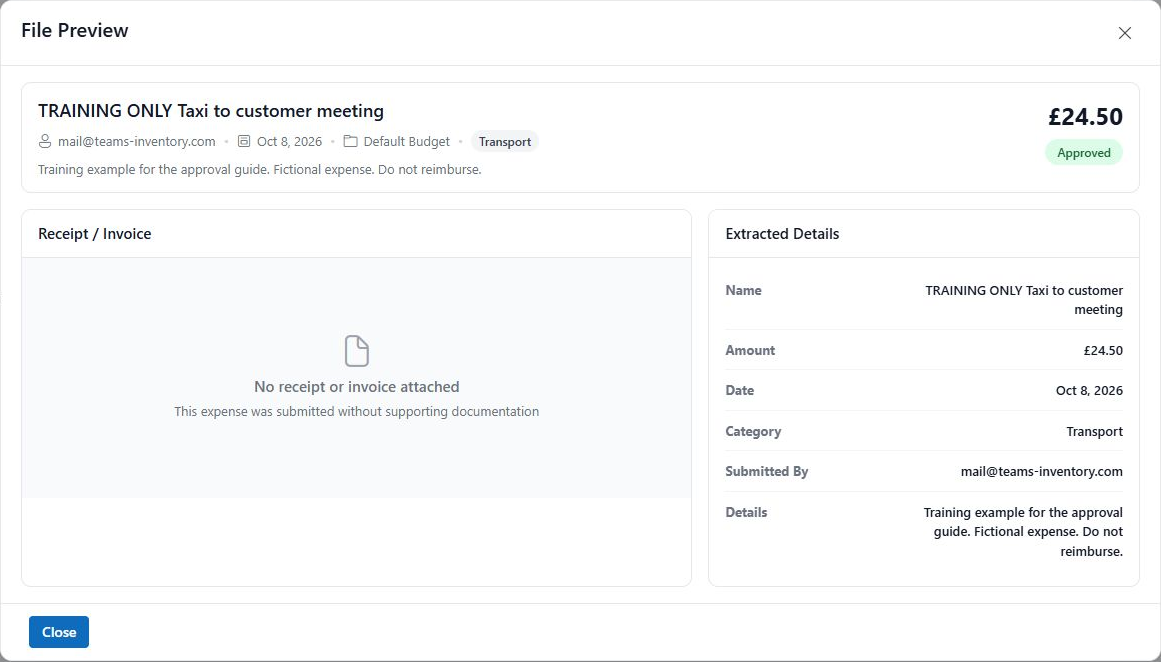
Training example: TRAINING ONLY Taxi to customer meeting, £24.50, Transport, 8 October 2026. The description identifies it as fictional and says Do not reimburse. Enter your own real claim details when using the app for work.
After saving a draft, return through View Expenses, find the claim and use its available actions to finish and submit. Before submitting, check the budget, required fields, business purpose and supporting receipt.
Follow the approval handoff
- After Submit, check the status in the expense report. Pending means that the manager decision is still outstanding.
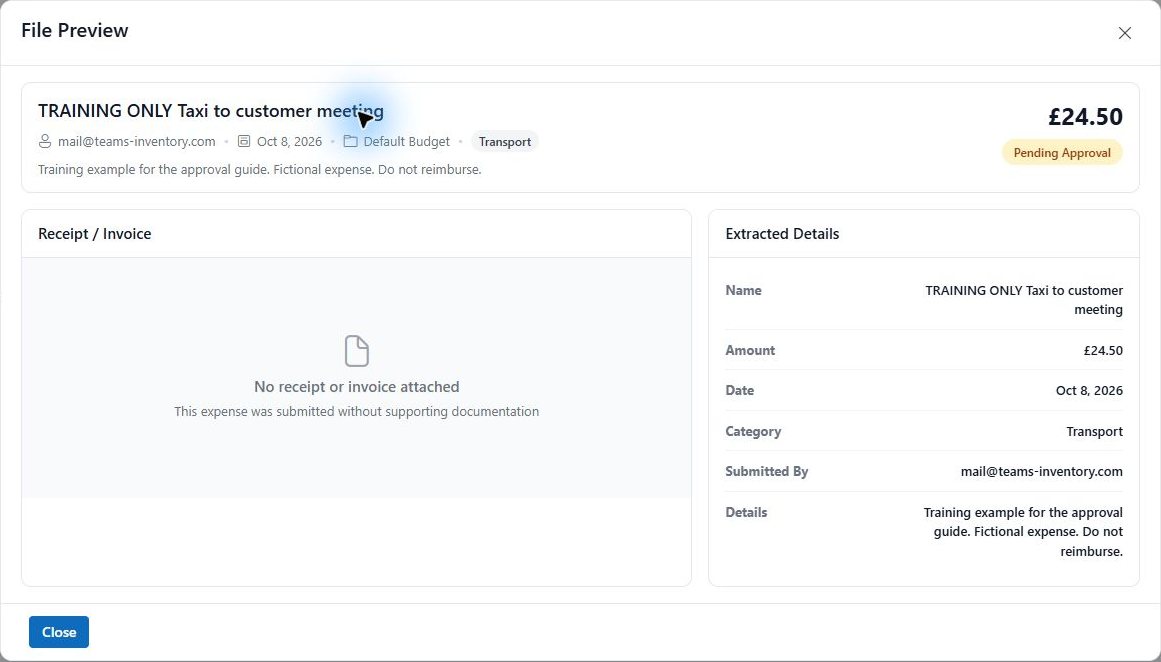
- Select the expense name to open File Preview. It shows the full details, supporting evidence and Pending Approval status.
- An assigned manager opens Approvals in the app, selects Review Expense and records an approval or rejection.
While waiting
Avoid submitting a duplicate. If the claim is taking longer than expected, contact the responsible manager or your Expenses administrator with the expense name, budget, date and amount. Check the saved status in View Expenses rather than relying only on a brief submission message.
This manually entered training example has no receipt. For real expenses, provide the supporting documentation required by your organisation.
Check the result and get help
- Return to View Expenses and find your claim. Close and reopen an existing preview if it still shows an earlier status.
- Approved means the manager accepted the claim. Reimbursement follows your company finance process.
- If the claim is Rejected, read the reason provided by the reviewer, address it and follow the available correction and submission process. Ask your administrator if you cannot find the required action.
Find a missing claim
Use Search expenses, widen the Date Range or select Clear All Filters. Check that you opened the correct budget and are signed in with the correct account. If Submit is disabled, complete the required fields and select a category if your budget requires one.
For budget access, approval routing or reimbursement questions, contact your internal administrator or finance team. For an app problem, use Support in the app footer. Include the affected budget, claim name, time and a screenshot of the issue.